
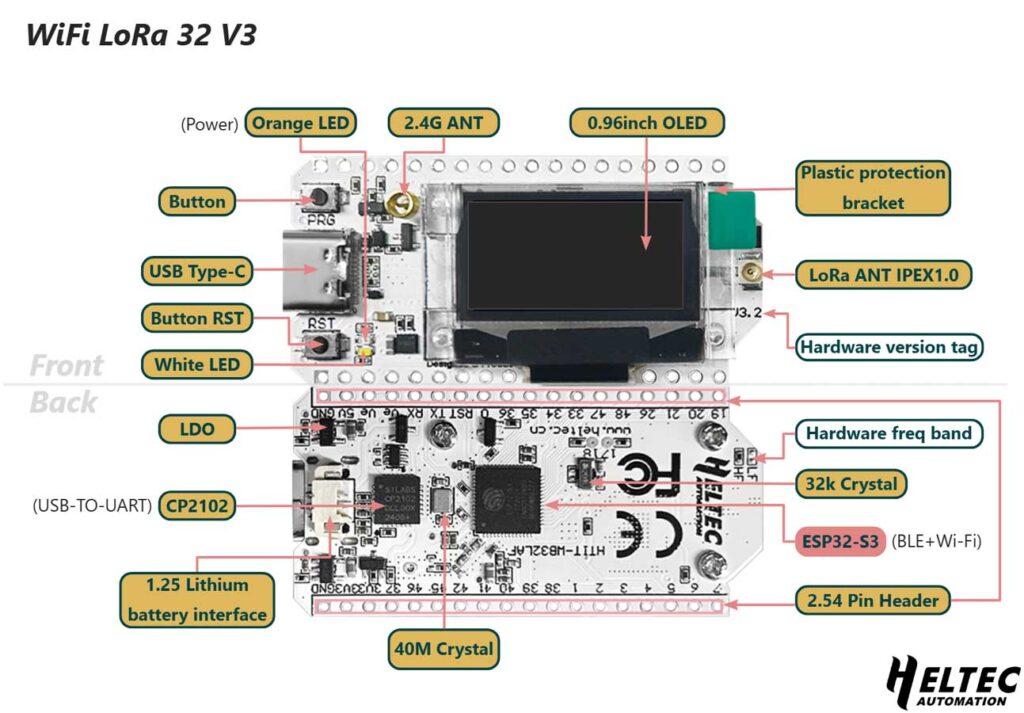
(Static crackles. The scent of ozone and lukewarm coffee hangs heavy in the air. A single, flickering monitor illuminates a face etched with the manic energy of a man wrestling with the digital frontier.)
Right. Let’s talk Meshtastic. Not the polite, sanitized version you find on the official website. No, we’re diving headfirst into the glorious, chaotic reality of getting a Heltec V3 humming with decentralized radio goodness. This isn’s a tutorial; it’s a confession. A chronicle of frustration, fleeting moments of triumph, and the creeping suspicion that I’m slowly merging with the machine.
(A long drag from a vaguely unsettling pipe. The smoke curls, mimicking the erratic signals bouncing off satellites.)

You see, the promise is seductive. A network of radios, whispering secrets across the landscape, bypassing the usual channels of control. A digital wilderness, ripe for exploration. But the path to that wilderness? Paved with driver installation nightmares and the constant threat of bricking your hardware.
(A frantic clicking as I navigate a browser window. The Heltec V3 sits on the desk, a tiny beacon of defiance.)
First, the ritual. The Silabs USB-to-UART bridge drivers. Don’t even think about skipping this step. Go to https://www.silabs.com/developers/usb-to-uart-bridge-vcp-drivers?tab=downloads and install the damn thing. Seriously. Don’t be a hero. Your Heltec will thank you. Or, more likely, it will remain stubbornly invisible, mocking your ambition.
(A muttered curse as I wrestle with a stubborn COM port.)
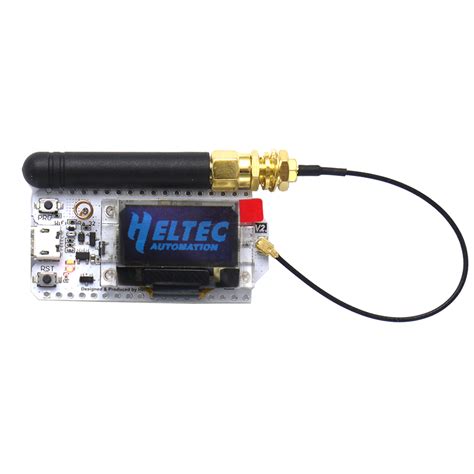
Once the board is recognized – a moment of pure, unadulterated joy – it’s off to https://flasher.meshtastic.org/ . Select Heltec V3. Choose the latest stable firmware. Click “Flash.” And for the love of all that is holy, choose “Full Erase.” Trust me on this. You’ll regret it if you don’t.
(The whir of the flashing process. A brief, unsettling feeling of being watched.)
Then, the client. https://client.meshtastic.org/ . New Connection. Serial. Select the node. Rename it if you feel like it. I christened mine “The Oracle.” Because, why not?
(A brief pause, a contemplative stare into the middle distance.)
Position Tab. Now, a crucial clarification. The Heltec V3 itself doesn’t have a built-in GPS chip. This tab only comes into play if you’ve attached an external GPS module and connected it to the board’s GPIO pins. Without that hardware addition, this tab is essentially a placeholder for future possibilities.
(A quick trip to the LoRa tab. A decisive click.)
LoRa Tab. This is where you dial in the radio’s frequency. For the US region, this means ensuring the radio transmits on 915 MHz. This is critical for compatibility with other US-based Meshtastic nodes. Double-check this setting – a mismatched frequency means silence.
(A shift in focus. The MQTT section begins.)
MQTT: Extending Your Reach
Let’s talk about MQTT. What is MQTT, you ask? Imagine a lightweight messaging protocol, designed for devices with limited bandwidth and power. It’s the backbone of many IoT (Internet of Things) applications, allowing devices to publish and subscribe to data streams. In the context of Meshtastic, MQTT allows your radio to communicate with a central server, extending its reach beyond the immediate vicinity of other Meshtastic nodes.
You can utilize MQTT functionality on the web client as well, provided your node is directly connected to a Wi-Fi network. However, the most convenient and powerful way to leverage MQTT is through the Android app.
To enable MQTT functionality, you’re going to need to configure the Channels settings. This involves enabling the “Use MQTT” option and providing the necessary server address, username, and password.
Now, let’s get to the mobile side. Download the Meshtastic Android app. You can connect to the radio via Bluetooth, which is a convenient alternative to the web client. The options are largely the same, but when it comes to MQTT, you must enable “Proxy to Client.” This setting is the key to unlocking the full potential of your Meshtastic network. It allows the radio to use your phone’s internet connection to communicate with the MQTT broker, effectively extending its range and functionality. Without it, your radio is isolated, a lonely outpost in the digital wilderness.
(A manic grin spreads across my face.)
Channels. Append a / to the main lobby. Choose a name. I created a channel called “Whispers of the Void.” Because, again, why not?
(The static intensifies. The screen flickers. A single, chilling thought echoes in the silence.)
This isn’t just about radios. It’s about escaping. About building something that can’t be controlled. About finding a little bit of freedom in a world that’s increasingly wired.
(A final, defiant exhale. The screen fades to black.)
Just… be careful out there. The void whispers back.
(End Transmission)
If you are looking for a casing for your own Heltec V3 build, we stock some that work with up to a 3000 mAh battery here!
If you want to skip the hassle and pick up a fully built and flashed Heltec V3 Node for the US Region, you can grab one here!


0 Comments